
Yes, I know, yet another dire pun. I can’t help myself. In justification, bread is God. I have always enjoyed making my own bread by hand, and have done so for a long time – always freestyle with approximations of ‘the bakers percentage’ (flour – 100%, everything else a proportion of this – water 60%, yeast 1% (dried), salt and fat 2% each). I also have a bread maker that I use to make ‘the daily bread’ loaves, mainly as a time saver. I simply do not have time to hand make each loaf we eat.
I am very grateful to own my breadmaker. A Panasonic SD-255, the only reliable breadmaker I have ever owned. It produces pretty good consistent quality bread with minimal effort – and has a timer so you can wake up to the smell of fresh bread in the morning. Making your own bread, by whatever means is always going to taste better than a mass-produced shop bought loaf (I don’t have the luxury of a local artisan baker here) and also has the bonus of being much cheaper – especially if you buy flour in bulk. So, it must be at least 4 years since I bought a loaf of bread.
Last week, a component of my grossly overworked breadmaker broke, inevitable after years of hard labour. Given the recent spate of electrical goods losses we have experienced, the last thing I wanted was to have to purchase a new breadmaker. Fortunately the broken part was a mechanical component and following disassembly by the technically capable Man Named Sous, and a lot of web searching, we found a replacement for the broken part at a cost of just £10 – a massive +£100 saving on a new breadmaker. Problem solved? No, not really.
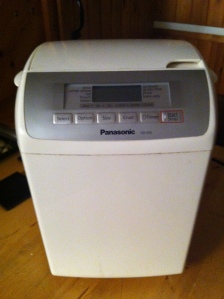
The repaired breadmaker
Having no breadmaker for about 10 days made me realise how complacent I had become about bread making over the last few years. Without realising it, I had lost a lot of my bread making Mojo over that time and I’d become, let’s face it, a bit slack. I felt ashamed.
It also magnified the fact that there are significant issues with bread making in our house. It’s reasonably cold at the moment, with frosty clear mornings resulting from clear skies overnight. Our house patiently awaits renovation. Current insulation levels are a joke and amount to a thin layer of polystyrene flapping about between the plasterboard and the stone walls. Yes, the croft house walls are thick (60cm), but this is a windy place.
When the ‘breeze’ does pick up here to its usual autumn / winter 40 – 80 mph gales, the house has proven to be hellishly draughty. Wind whistles through the electrical sockets and our rug at the top of the stairs levitates above the draughty floorboards (I am not exaggerating!). Oh, and another small issue is that we have no central heating. Yet. We do have a stove, but controlling the draw by the wind can be difficult in a gale, exacerbating the problem of keeping the place warm (not least because the chimney cowl was blown off in a storm).
The open plan lounge/kitchen has usually fallen to about 14C by mid afternoon. By mid evening, the stove stoked to the max, we are lucky if we can reach the toastiness of 18C. I don’t function well at these temperatures any more than the yeast in our bread does.
Of course, I had been taking the easy option, making dough for pizza, foccacia and pittas in the breadmaker. Chuck the ingredients in, 45 minutes later, voila, take out your dough, or leave to prove in the bread maker for a bit longer. No worries, the little heated element within keeps the dough at an optimal temperature, yeast loves it.
In facing the quandary of how I would be able to get a temperature warm enough to make the yeast reactive as well as find the time to hand make a loaf, I made a fateful error and bought a sliced loaf from the supermarket. That was a very bad idea for obvious reasons: the dry cardboard flavour and texture and too many additives. At least it shocked me into bread making mode.
After perusing some dough-related books and the web, I was ready to take on the challenge again – even in the cold. Time for kill or cure.
I opted to make a basic recipe using malted grain. I lit the stove and looked at strategies to get the yeast to do its work. This meant hovering the bowl and baking trays over the stove to encourage yeast action. It sort of worked, but took way longer than I anticipated – only really possible at the weekend for me.
Instead of my usual freestyling loaf, I needed a bit more input to get it right. I read the instructions to produce a basic loaf outlined in the River Cottage Handbook No.3 – Bread. I chose malted grain because I found our local independent Bayhead Shop selling it. The mix is usually mainly white flour mixed with a proportion of wholemeal flour, malt powder and malted grains.
Ingredients
1kg malted grain flour
10g dried yeast
20g fine salt
600ml warm water
1 tblsp melted butter
handful of rye flour for coating
Method
- Mix the dry ingredients in a bowl. Sometimes I warm up the flour to make the yeast react more quickly. Add the butter then the warm water.
- Adjust the amount of water or flour at the end to get a relatively sticky dough, turn it out onto the work surface.
- Knead for 10 minutes, in your chosen style. Whatever your kneading style, make sure the dough gets smooth and silky.
- Shape it into a round and rub with oil. Place in a bowl and cover with a plastic bag to ferment. It should about double in size. This make take as little as 45 minutes in a cosy house, for me, it took 3 hours!
- Tip out the dough onto a surface again and deflate using your fingertips. Don’t batter it about too much when knocking it back.
- You can leave it again to rise. The handbook suggests up to another 4 times to improve texture and flavour. That would have taken me until the next week, so I did this once.
- Divide up the dough and shape as desired. I made 2 big loaves, you could make several small, or rolls.
- Coat the loaves with a little rye flour to improve the look and texture of the exterior.
- At this point, turn up the oven high, I tried 250C. Leave your shaped loaves to prove while the oven heats.
- When the loaves have risen significantly (almost double), they are ready for the oven. Slash the tops about 1 cm deep, if desired.
- Put an oven tray with boiling water from the kettle into the bottom of the oven just before you put in your loaves. This enhances the crust texture and give a good rise in the oven.
- After 10 minutes, turn the oven down – the temperature will depend on the colour at this stage. If pale, turn down to 200C, if browning quickly, 170C.
I left my 2 big loaves in for 50 minutes. Tap the bottom when you take them out – they should sound hollow.
All in all, I was pleased with the result. Although it was a bit epic, I aim to hand make one loaf a week from now on to keep my hand in. And these loaves did taste better than those produced in the breadmaker, so worth the extra toil.
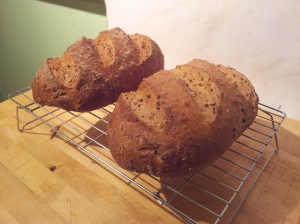
Malted grain loaves – Welcome back, my real friends

the loaves look good and probably tasted good too. I am totally spoilt as I have my own personal baker and there is nothing better than real bread. If you are struggling with the temperature you could try soda bread – different taste and texture but still better than the factory produced alternatives.
Thanks, yes, you are lucky. If only I could eat cellos…. I do make soda bread occasionally, but it might be more often this winter!
You certainly bake in challenging conditions! I’d be tempted to shove the bowl up my jumper and leave it there to prove LOL!!
Your finished loaves look delicious and much more preferable to supermarket stuff.
Thanks, I can vouch that the bread may not have been perfect, but better than cardboard supermarketofferings. Maybe a bread papoose would be the ideal remedy?!
If I need a dough to rise I put the oven on highish for about ten seconds, switch it off and stick the dough in there in a bowl with a damp tea towel over the dough. I sometime repeat it in the process. I really works! Yesterday the stollen was rising beautifully. I have not made bread for a while, but the oven method worked with bread too. On Uist my house would win the draft competition – rugs flying above the floor boards. I either used the oven or the airing cupboard with the hot water tank in it. Your bread looks magnificient!
I just realized – you have a gas oven, don’t you? But it should work too I would think…
Thanks, my oven is electric! I tried this technique for rolls and it worked really well, so thanks!
We used a bread maker for years until the teflon coating cracked, exposing the carcinogenic glue. My wife bakes bread three times a week after grinding the wheat berries (not manually), using a dough hook on a mixer because our wrists can’t take the kneading anymore, and letting it rise in a preheated-for-one-minute oven. It works well that way.
The info about the glue is alarming! Even more incentive to hand make bread. Thanks for the tips, much appreciated, Tracey